Mise-en-scene

Lighting

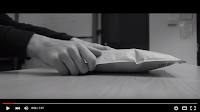
Mise-en-scene refers to showing everything that is within a scene. This is stuff like camera angles, props and costumes which are essential to show to the audience. One of the key areas that we used mise-en-scene was the introduction of the package. From the beginning you can see that all the camera angles, setting, lighting and props was all used to imply the importance of this package. From the close up of seeing the package being passed from person to the next we are able to see how significant the envelope is due to never being left alone till the ending. The use of mise-en-scene continues with seeing a low angle shot of the package being held by a new person and how mysterious and secret this package is. With using mise-en-scene within our work we were able to let the audience see that this package has more significance than expected and how the use of music makes it more dark and mysterious.


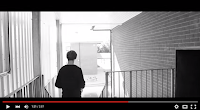
Lighting is all to do with getting the right amount of light to be shown within each scene. If the lighting isn't right then the audience is unable to see all the details that the directors want within the film. Within our project we focused on getting the lighting as good as possible due to wanting to make it black and white. I found in our scene that we were using ambient lighting which is the use of available natural lighting. This became a problem however due to filming on a cloudy day and filming on the second day were it was more sunny. This caused us to struggle with the exposure levels when coming in and out of buildings throughout our piece. Even though this was difficult I found our group was able to make it successful with editing and retaking shots we did not find to be strong enough with the rest of the clips. Below is the shot we struggled to get good lighting with due to the exposure when coming outside.


High or Low Camera Angles


High Camera Angles are where the camera is looking down at an actor to show how vulnerable and weak they are towards the audience; whilst Low Camera Angles are where the camera looks up at someone to show power, authority and success. In our group we had a few low camera angle shots; one at the beginning and one near the end. The one at the beginning was to show the power that the actor had then received and how mysterious the package is to him and the audience. The second use of the low camera angle was at the end with Joe coming down the steps to show that he was able to escape from the chase and portrays success towards the audience. Looking back at the clip I found that we didn't use any high angle shots within our clip and would be one of the things that we would add if we did this project again.


Different Shot Distances
Throughout film and media there is a wide range of shots and angles that can be used to portray different emotions to the audience. The main six are Extreme Close-up, Close-up, Medium, Long, Extreme Long and Wide.
An Extreme Close-up is where you focus on a particular detail where tension or suspense is being created. An example of this would be a single eye or both the eyes.
A Close-up is a little further away and shows mainly the face and shoulders to the audience which is there to show emotion and detail.
A Medium shot is where you see from the waist up on an actor and is a great shot to show facial and body language, costume and emotion.
Long shots are used to show the whole body of an actor, whilst Extreme Long shot is used to show the environment.
The last one is Wide Shot which is where you shows a full body shot with parts of the surrounding beside it also.
There is also Point of View shot and Over-the-shoulder shot.
POV is to show the actual point of view of a victim and is shown within most horror movies. Over-the-shoulder is most common in interviews and conversations and is where the camera is positioned over a characters shoulder to show where the other character is.
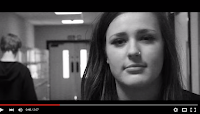
Within our film we used a range of camera angles to portray suspense and tension. The most common ones we used within our project was Medium, Close-up and Long shots to allow the audience to follow the story. We also used a POV shot to bring more suspense into the piece half way through the scene, such as Neve looking for Joe.
The only shots we did not use was an Extreme Close-up and an Extreme Long shot.
Below are some screenshots of various shots we took within our project.


Fades or Dissolves
We did not use any Dissolves however in our work but instead used a fade from black. If we were to do the project again we would add more editing techniques like Dissolve and Fading.
An Extreme Close-up is where you focus on a particular detail where tension or suspense is being created. An example of this would be a single eye or both the eyes.
A Close-up is a little further away and shows mainly the face and shoulders to the audience which is there to show emotion and detail.
A Medium shot is where you see from the waist up on an actor and is a great shot to show facial and body language, costume and emotion.
Long shots are used to show the whole body of an actor, whilst Extreme Long shot is used to show the environment.
The last one is Wide Shot which is where you shows a full body shot with parts of the surrounding beside it also.
There is also Point of View shot and Over-the-shoulder shot.
POV is to show the actual point of view of a victim and is shown within most horror movies. Over-the-shoulder is most common in interviews and conversations and is where the camera is positioned over a characters shoulder to show where the other character is.
Within our film we used a range of camera angles to portray suspense and tension. The most common ones we used within our project was Medium, Close-up and Long shots to allow the audience to follow the story. We also used a POV shot to bring more suspense into the piece half way through the scene, such as Neve looking for Joe.
The only shots we did not use was an Extreme Close-up and an Extreme Long shot.
Below are some screenshots of various shots we took within our project.


Fades or Dissolves
Fades are used to portray the ending of a film. It is much slower than cutting straight to black at the end of the film and suits slower paced scenes to make it more dramatic.
Dissolve is also known as a cross fade which is fading one clip into another clip.
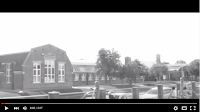
Within our piece of work we used one fade which was to fade into our establishing shot. This was to show the beginning of the scene and with the music made it slightly tense. We also had a fade out near the end of our piece to show that the ending was near and brought more tension towards the audience. Here is the fade in on the establishing shot below.

Dissolve is also known as a cross fade which is fading one clip into another clip.
Within our piece of work we used one fade which was to fade into our establishing shot. This was to show the beginning of the scene and with the music made it slightly tense. We also had a fade out near the end of our piece to show that the ending was near and brought more tension towards the audience. Here is the fade in on the establishing shot below.


We did not use any Dissolves however in our work but instead used a fade from black. If we were to do the project again we would add more editing techniques like Dissolve and Fading.
The Continuity System

Match cuts on Action
Match on Action is where you have two clips that show action carrying on through a transition. An example of this would be a man getting into a car. The first clip you'd have would be a long shot of the man getting into the car on the side of the road. The transition would take you instantly into a close-up shot of the mans hand holding the keys in the ignition to show the car starting up. With these scenes placed together so quickly the audience is able to see a continuous flow of action. For our Match on Action we did Neve walking through a door. The first clip we used was a medium shot of never opening the door and turning to close it. The next transition was a close-up of Neve's hand pushing the door shut. Below is the screenshots of our Match on Action and we believed it was a successful way to show a Match on Action within our project.


POV shots
As I said above, a Point of View shot is where you show the actual view point of a character and is used mainly within horror films. We used one Point of View shot within our piece and that was during the chase. Whilst making this clip we wanted it to portray tension and worry towards the audience and found that it worked well as we continued through filming. Our Point of View shot was in Neve's POV looking for Joe in the corridor and rooms.


Shot Reverse Shot


180 Degree Rule
The 180 Degree Rule is where an imaginary axis is used where the cameras can be placed to show continuity in the filing sequence.
The image beside shows how the 180 Degree Rule works. You have the interviewer and the interviewee on either side of each other as though they are about to start an interview. The line known as "Axis of Action" is the line you must not cross when filming the interview. The cameras must stay on the semi-circle that is drawn on one side of the interview. The reason the camera must stay on one side it will appear as though the interviewer/interviewee would have changed location due to the background change. There would also be the worry of people walking around behind them as well as looking like they have swapped places. Looking back at our project I believe that we did well not to break the 180 Degree Rule and did good with displaying the different shots without breaking this key filming sequence.
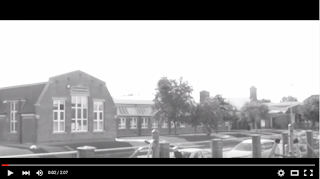
Establishing ShotsAn Establishing Shot is where you show the audience where the scene is being set. Our Establishing Shot was outside the college and we saw that we had some problems looking back at the piece. One of the problems we noticed was it was slightly blurry and not sharp. Also the exposure was too bright on the camera. With seeing these problems we had at the end of the filming we realised this would be one of the things that we would do again.
The 180 Degree Rule is where an imaginary axis is used where the cameras can be placed to show continuity in the filing sequence.
The image beside shows how the 180 Degree Rule works. You have the interviewer and the interviewee on either side of each other as though they are about to start an interview. The line known as "Axis of Action" is the line you must not cross when filming the interview. The cameras must stay on the semi-circle that is drawn on one side of the interview. The reason the camera must stay on one side it will appear as though the interviewer/interviewee would have changed location due to the background change. There would also be the worry of people walking around behind them as well as looking like they have swapped places. Looking back at our project I believe that we did well not to break the 180 Degree Rule and did good with displaying the different shots without breaking this key filming sequence.
Establishing ShotsAn Establishing Shot is where you show the audience where the scene is being set. Our Establishing Shot was outside the college and we saw that we had some problems looking back at the piece. One of the problems we noticed was it was slightly blurry and not sharp. Also the exposure was too bright on the camera. With seeing these problems we had at the end of the filming we realised this would be one of the things that we would do again.

Match cuts on Action
Match on Action is where you have two clips that show action carrying on through a transition. An example of this would be a man getting into a car. The first clip you'd have would be a long shot of the man getting into the car on the side of the road. The transition would take you instantly into a close-up shot of the mans hand holding the keys in the ignition to show the car starting up. With these scenes placed together so quickly the audience is able to see a continuous flow of action. For our Match on Action we did Neve walking through a door. The first clip we used was a medium shot of never opening the door and turning to close it. The next transition was a close-up of Neve's hand pushing the door shut. Below is the screenshots of our Match on Action and we believed it was a successful way to show a Match on Action within our project.


Eye-line Match Cuts
An Eye-line Match is to show a character's line of sight. An example of this would be a close-up shot of a man looking out a window. The transition then changes to an establishing shot on what he can see. The second image is also a POV shot.
An Eye-line Match is to show a character's line of sight. An example of this would be a close-up shot of a man looking out a window. The transition then changes to an establishing shot on what he can see. The second image is also a POV shot.
For our Eye-line Match we had Neve look over a balcony to try to find Joe. In this clip we used a medium shot and went into a POV shot of the area she was looking towards. We found this to be a success due to the lighting being good and how the clips fitted in well together. Our example of doing this shot is below.


POV shots
As I said above, a Point of View shot is where you show the actual view point of a character and is used mainly within horror films. We used one Point of View shot within our piece and that was during the chase. Whilst making this clip we wanted it to portray tension and worry towards the audience and found that it worked well as we continued through filming. Our Point of View shot was in Neve's POV looking for Joe in the corridor and rooms.


Shot Reverse Shot
A Shot Reverse Shot is where you make the character maintain position to make it look as realistic as possible. Our Shot Reverse Shot was when Joe walked down the corridor on the left hand side and Neve went past him on the right hand side. The camera then did a close up on Neve turning to Joe but still remaining on the correct sides of the corridor. The final shot of this technique was of Joe slowly turning round to see Neve looking at him. Once again Joe remains on the right hand side of the corridor and Neve is still on the left. This therefore allows the audience to see that it is realistic and not much movement has been done by either character. Below is our Shot Reverse Shot screenshots that we found to be a success.


Summary
Altogether I have learnt different camera shots that make a film or short piece successful and know what shots would look good on characters; such as a villain on the stairs would need a low angle shot to portray power towards the audience. With editing I have learnt how to place clips onto Premier Pro and how to add music onto the clips. I enjoyed working with the camera and shooting the different angles the most and found our piece to be a success.
Altogether I have learnt different camera shots that make a film or short piece successful and know what shots would look good on characters; such as a villain on the stairs would need a low angle shot to portray power towards the audience. With editing I have learnt how to place clips onto Premier Pro and how to add music onto the clips. I enjoyed working with the camera and shooting the different angles the most and found our piece to be a success.